Follow us on Facebook

H&H PaveScapes
  • HOME
  • ABOUT US
  • SERVICES
    • PAVERS
    • RETAINING WALLS
    • CONCRETE REPAIR
    • LIGHTING
    • WATER GARDENS
    • ASPHALT PAVING
    • SNOW REMOVAL
  • CONTACT
  • More
    • HOME
    • ABOUT US
    • SERVICES
      • PAVERS
      • RETAINING WALLS
      • CONCRETE REPAIR
      • LIGHTING
      • WATER GARDENS
      • ASPHALT PAVING
      • SNOW REMOVAL
    • CONTACT
H&H PaveScapes
  • HOME
  • ABOUT US
  • SERVICES
    • PAVERS
    • RETAINING WALLS
    • CONCRETE REPAIR
    • LIGHTING
    • WATER GARDENS
    • ASPHALT PAVING
    • SNOW REMOVAL
  • CONTACT

Repair Process

Step 1

Step 1

Step 1

Flexkrete, Concrete Repair, Concrete Restoration

Identify the area(s) that need to be repaired and mark the slab.

Step 2

Step 1

Step 1

Flexkrete, Concrete Repair, Concrete Restoration

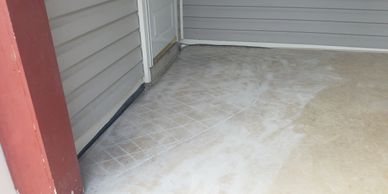
Prepare the repair area by lightly grinding to remove loose debris and etch the area to create a better bond to the concrete.

Step 3

Step 1

Step 3

Flexkrete, Concrete Repair, Concrete Restoration

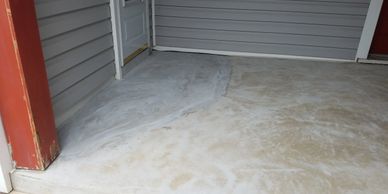
Resin coat and build the area with FlexKrete slurry mix to achieve the desired elevation.  Finish lightly grinding the remaining slab.

Step 4

Step 4

Step 3

Flexkrete, Concrete Repair, Concrete Restoration

Finish the resin coat on the remaining slab to promote better adhesion for the quartz application.

Step 5

Step 4

Step 5

Flexkrete, Concrete Repair, Concrete Restoration

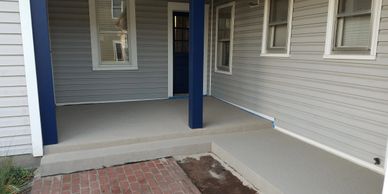
Apply another coat of FlexKrete resin and broadcast the desired quartz on the area to rejection.

Step 6

Step 4

Step 5

Flexkrete, Concrete Repair, Concrete Restoration

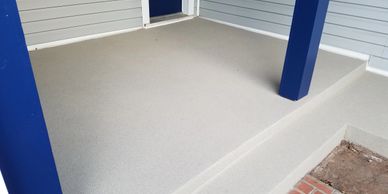
Remove the excess quartz and apply the final coat of resin.  Broadcast the final coat of quartz.  Remove excess and apply sealer.

Copyright © 2024 H&H PaveScapes - All Rights Reserved.


Powered by GoDaddy